Crispy Oven-Baked Chicken Wings With Simple Seasoning
Preparing crispy oven-baked chicken wings with simple seasoning at home is a rewarding way to enjoy a classic pub favorite without the hassle of deep-frying. By focusing on a few foundational techniques, you can achieve a shatteringly crisp skin and juicy interior that rivals any restaurant version. This approachable method relies on basic pantry staples to transform raw poultry into a golden, savory snack.
You will find that mastering this process allows for endless flavor variations while keeping the core texture consistent and satisfying. Whether you are hosting a game day gathering or just craving a comfort food treat, this reliable technique delivers perfect results every single time.
- Prep time: 15 minutes
- Cook time: 30 minutes
- Total time: 45 minutes
- Servings: 4
- Calories: 420 per serving
Ingredients
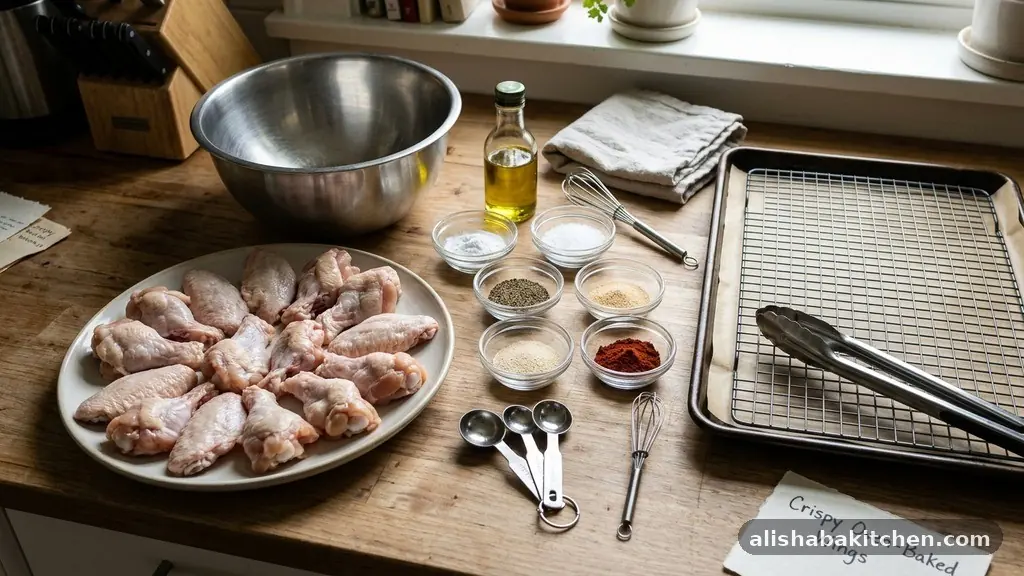
- 2 pounds fresh chicken wings, separated into flats and drumettes
- 1 tablespoon aluminum-free baking powder
- 1 teaspoon kosher salt
- 1/2 teaspoon freshly cracked black pepper
- 1/2 teaspoon garlic powder
- 1/2 teaspoon smoked paprika
- 1 tablespoon neutral vegetable oil
Instructions
- Preheat your oven to 425°F (220°C) to ensure a high-heat environment that renders fat efficiently.
- Line a large rimmed baking sheet with aluminum foil and place a wire cooling rack on top to promote airflow.
- Pat the chicken wings completely dry using several layers of paper towels, as moisture is the enemy of crispiness.
- Place the dried wings into a large mixing bowl and toss them with the vegetable oil until each piece is lightly coated.
- In a small separate bowl, whisk together the baking powder, salt, pepper, garlic powder, and smoked paprika.
- Sprinkle the dry seasoning mixture over the wings and toss thoroughly to ensure an even coating on every piece.
- Arrange the wings on the prepared wire rack, ensuring they are not touching so the heat can circulate around each one.
- Bake for 30 to 40 minutes, rotating the pan halfway through, until the skin is deep golden brown and feels crisp to the touch.
- Remove the tray from the oven and let the wings rest for 5 minutes before serving to allow the juices to redistribute.
The Science of Crispy Skin
Achieving that signature crunch without a deep fryer is entirely possible when you understand how moisture affects poultry. When you start with a dry surface, you allow the heat of the oven to work directly on the skin rather than steaming it.
Using a wire rack is a critical step because it allows hot air to hit the bottom of the wing simultaneously with the top. This prevents the wings from sitting in their own rendered fat, which would otherwise result in a soggy underside.
Baking powder acts as the secret weapon in this recipe. It reacts with the surface of the skin to create tiny bubbles and increase the surface area, which helps create a light, airy crunch. Be sure to use standard aluminum-free baking powder rather than baking soda, as the latter can leave a bitter metallic aftertaste.
This chemical reaction is essentially a shortcut to the texture usually achieved by immersion in hot oil. It is a simple, effective trick that changes the entire quality of your baked chicken.
Selecting the Best Wings
Quality starts at the butcher counter, so look for plump, fresh wings that appear clean and have no off-putting odor. If you purchase whole wings, you will need to cut them at the joints yourself to separate the drumette from the flat.
Saving the wing tips for a homemade stock is a great way to minimize waste while adding depth to future soups. Larger, meatier wings are generally preferred for this recipe because they hold up better to the higher baking temperatures without drying out.
Always inspect the wings for any remaining pinfeathers or stray bits of cartilage after you have performed the cut. A quick rinse under cold water is optional, but if you do it, you must spend extra time patting the meat dry. Any residual water on the surface will create steam, which interferes with the Maillard reaction—the browning process that creates deep flavor.
Spending an extra two minutes on preparation will pay dividends in the final texture of your wings. You can learn more about safe food handling practices to ensure your kitchen remains clean during this process.
Mastering the Seasoning Blend
While the base recipe uses a simple dry rub, the beauty of this dish is its versatility. Garlic powder and smoked paprika provide a savory, slightly sweet base that pairs perfectly with almost any dipping sauce.
If you prefer a bit of heat, consider adding a pinch of cayenne pepper or crushed red chili flakes to the dry mix. You can also experiment with dried herbs like oregano or thyme if you want a more Mediterranean flavor profile.
The key to applying seasoning is to ensure the wings are dry enough for the oil to act as an adhesive. If the wings are wet, the spices will clump together, leading to uneven flavor distribution. Toss the wings in the oil first, then add the dry ingredients gradually while mixing with your hands.
This ensures that every nook and cranny of the wing is covered in flavor. Remember that the salt in the rub will draw out some moisture, so try to get the wings into the oven shortly after seasoning them.
Oven Temperature and Timing
High heat is non-negotiable when you are aiming for crispy baked wings. A temperature of 425°F is the sweet spot because it is hot enough to crisp the skin quickly without burning the spices.
If your oven tends to run hot, keep a close eye on the wings after the 25-minute mark to ensure the garlic powder doesn’t scorch. You want the skin to reach a deep, bronzed color, which indicates that the fat has rendered out completely.
Do not be tempted to crowd the pan, as this causes the wings to steam rather than roast. If you have a large batch, it is better to use two separate baking sheets rather than cramming everything onto one. Rotate the pans between the top and bottom racks halfway through the cooking time to ensure even browning.
If you notice one side of the oven is hotter, turn the pans 180 degrees to ensure the wings finish at the same rate. Patience during the final few minutes of cooking is what separates a good wing from a great one.
Frequently Asked Questions
Why is my skin not getting crispy?
The most common culprit is surface moisture. If the wings were not patted completely dry, the oven will steam the meat instead of crisping the skin. Additionally, ensure you are using a wire rack to allow air circulation underneath the chicken.
Can I add sauce after baking?
Absolutely, but you should do it right before serving. If you toss the wings in a wet sauce too early, the moisture will soften the crispy skin you worked so hard to achieve. Toss them in a bowl with your favorite sauce for just a few seconds until coated and serve immediately.
Do I really need the baking powder?
While you can achieve a decent result without it, baking powder is the secret to the signature crunch. It raises the pH level of the skin, which helps it brown faster and creates a bubbly, crispy texture. It is highly recommended for the best possible results.
How do I store and reheat leftovers?
Store leftover wings in an airtight container in the refrigerator for up to three days. To reheat, place them in a 400°F oven for about 10 minutes until they are heated through and the skin crisps up again. Avoid the microwave, as it will make the skin rubbery and soft.
Can I use frozen wings?
It is best to thaw frozen wings completely before you begin the recipe. Once thawed, you must pat them extremely dry with paper towels to remove all excess ice crystals. Failure to do this will result in a soggy mess rather than the crispy texture you want.
Conclusion
Mastering the art of crispy oven-baked chicken wings with simple seasoning is a practical skill that transforms your home cooking routine. By prioritizing dry surfaces and proper airflow, you can create a restaurant-quality snack that is both healthier and more cost-effective than ordering out. This method provides a solid foundation for endless creativity, whether you serve them plain, with a side of ranch, or tossed in your favorite spicy glaze.
We hope you enjoy the process of perfecting these wings in your own kitchen. Start with the simple seasoning blend provided here, and feel free to adjust the ratios to suit your personal preferences.
Once you see how straightforward the process is, you will likely find yourself making this recipe a regular part of your weekend rotation. Happy cooking, and enjoy those perfectly crispy bites.
Crispy Oven-Baked Chicken Wings With Simple Seasoning
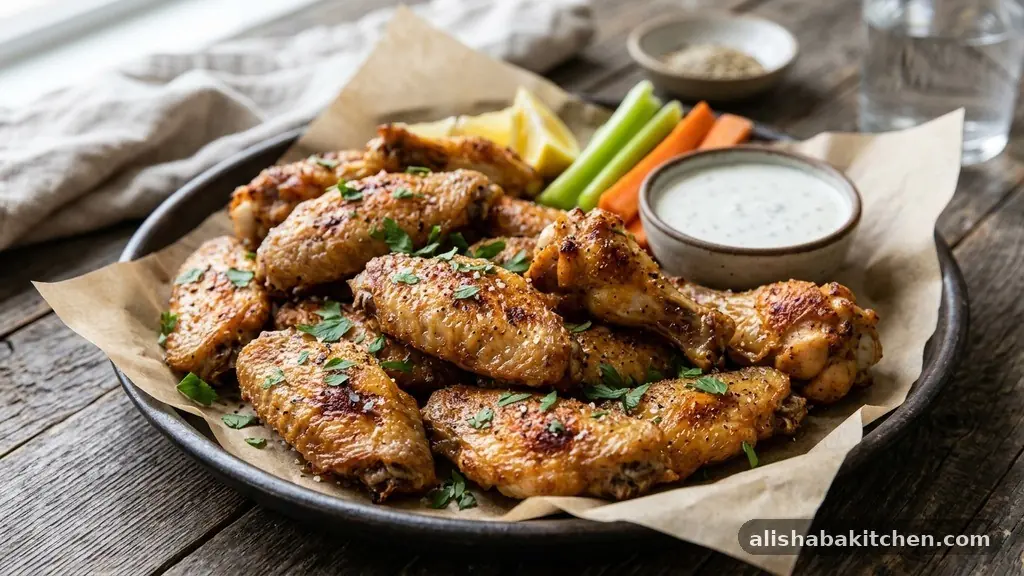
Preparing crispy oven-baked chicken wings with simple seasoning at home is a rewarding way to enjoy a classic pub favorite without the hassle of deep-frying.
Ingredients
- 2 pounds fresh chicken wings, separated into flats and drumettes
- 1 tablespoon aluminum-free baking powder
- 1 teaspoon kosher salt
- 1/2 teaspoon freshly cracked black pepper
- 1/2 teaspoon garlic powder
- 1/2 teaspoon smoked paprika
- 1 tablespoon neutral vegetable oil
Instructions
- Preheat your oven to 425°F (220°C) to ensure a high-heat environment that renders fat efficiently.
- Line a large rimmed baking sheet with aluminum foil and place a wire cooling rack on top to promote airflow.
- Pat the chicken wings completely dry using several layers of paper towels, as moisture is the enemy of crispiness.
- Place the dried wings into a large mixing bowl and toss them with the vegetable oil until each piece is lightly coated.
- In a small separate bowl, whisk together the baking powder, salt, pepper, garlic powder, and smoked paprika.
- Sprinkle the dry seasoning mixture over the wings and toss thoroughly to ensure an even coating on every piece.
- Arrange the wings on the prepared wire rack, ensuring they are not touching so the heat can circulate around each one.
- Bake for 30 to 40 minutes, rotating the pan halfway through, until the skin is deep golden brown and feels crisp to the touch.
- Remove the tray from the oven and let the wings rest for 5 minutes before serving to allow the juices to redistribute.
Similar Posts
How to Make Crispy Fried Potatoes at Home
Mastering the art of making Crispy Fried Potatoes at Home transforms a simple pantry staple into a golden, savory side dish that rivals any restaurant serving. You’ll find that achieving that perfect balance of a crunchy, seasoned exterior and a pillowy, soft interior requires just a few specific techniques rather than complicated equipment. By controlling…
Creamy Garlic Chicken Recipe for a Quick Family Dinner
Finding a reliable Creamy Garlic Chicken Recipe for a Quick Family Dinner can transform your weeknight routine into something special. This dish balances tender poultry with a rich, aromatic sauce that feels indulgent but comes together in under forty-five minutes. You’ll appreciate how the simple ingredients meld into a restaurant-quality meal that satisfies even the…
Simple Chicken Rice Recipe for a Complete Family Meal
Finding a reliable, simple Chicken Rice Recipe for a Complete Family Meal is the secret to stress-free weeknight dinners. This dish combines tender protein and fluffy grains into one pot, saving you time on cleanup while delivering comfort in every bite. Whether you are feeding hungry kids or looking for a quick meal prep solution,…
Easy Homemade Beef Burgers With Simple Ingredients
Making easy Homemade Beef Burgers With Simple Ingredients is one of the most rewarding skills you can bring into your kitchen. You don’t need fancy equipment or a long list of obscure items to create a juicy, flavorful meal that beats any fast-food alternative. By focusing on high-quality meat and a few pantry staples, you…
How to Make Classic Mac and Cheese From Scratch
Making Classic Mac and Cheese From Scratch is a fundamental skill that transforms simple pantry staples into pure comfort. By mastering a proper béchamel sauce and choosing the right cheeses, you can create a dish that far surpasses any boxed version. This process relies on balancing creamy textures with a sharp, savory flavor profile. Whether…
Creamy Chicken Pasta Recipe for an Easy Weeknight Meal
Finding a reliable creamy chicken pasta recipe for an easy weeknight meal is often the key to keeping your kitchen routine stress-free and satisfying. This dish brings together tender protein and velvety sauce in a way that feels indulgent yet remains entirely achievable after a long day. You will appreciate how quickly it comes together,…